Acceleration Training with Tape Drills

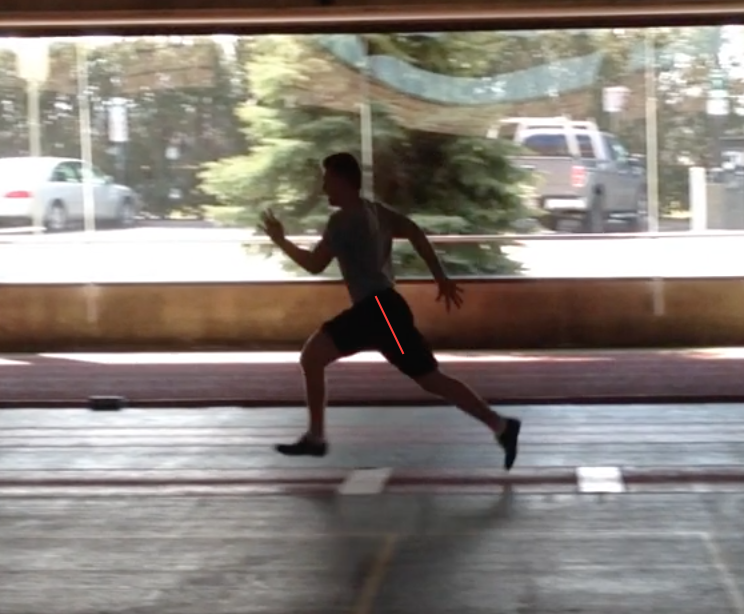
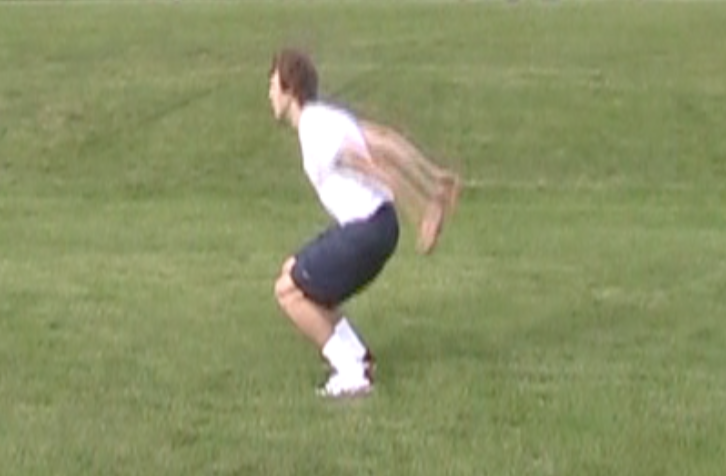
Acceleration is a critical skill in field and court sports as well as Track  & Field.  Being able to build momentum explosively helps athletes beat competitors to the spot or outrun the competition.  Being able to do this efficiently allows athletes to be in position to execute other sport skills following acceleration.  For a football player this may be making a cut to avoid a defender, while for a track athlete the efficiency of the acceleration will influence their maximum speed and their ability to maintain it.  Additionally, accelerating with high biomechanical efficacy makes gathering speed more repeatable while decreasing injury factors.  A fabulous option to enhance acceleration performance and especially efficiency that I’ve been using more frequently over the past few years is the Tape Drill.

The Tape Drill

Hurdler executing a tape drill to hurdle 1

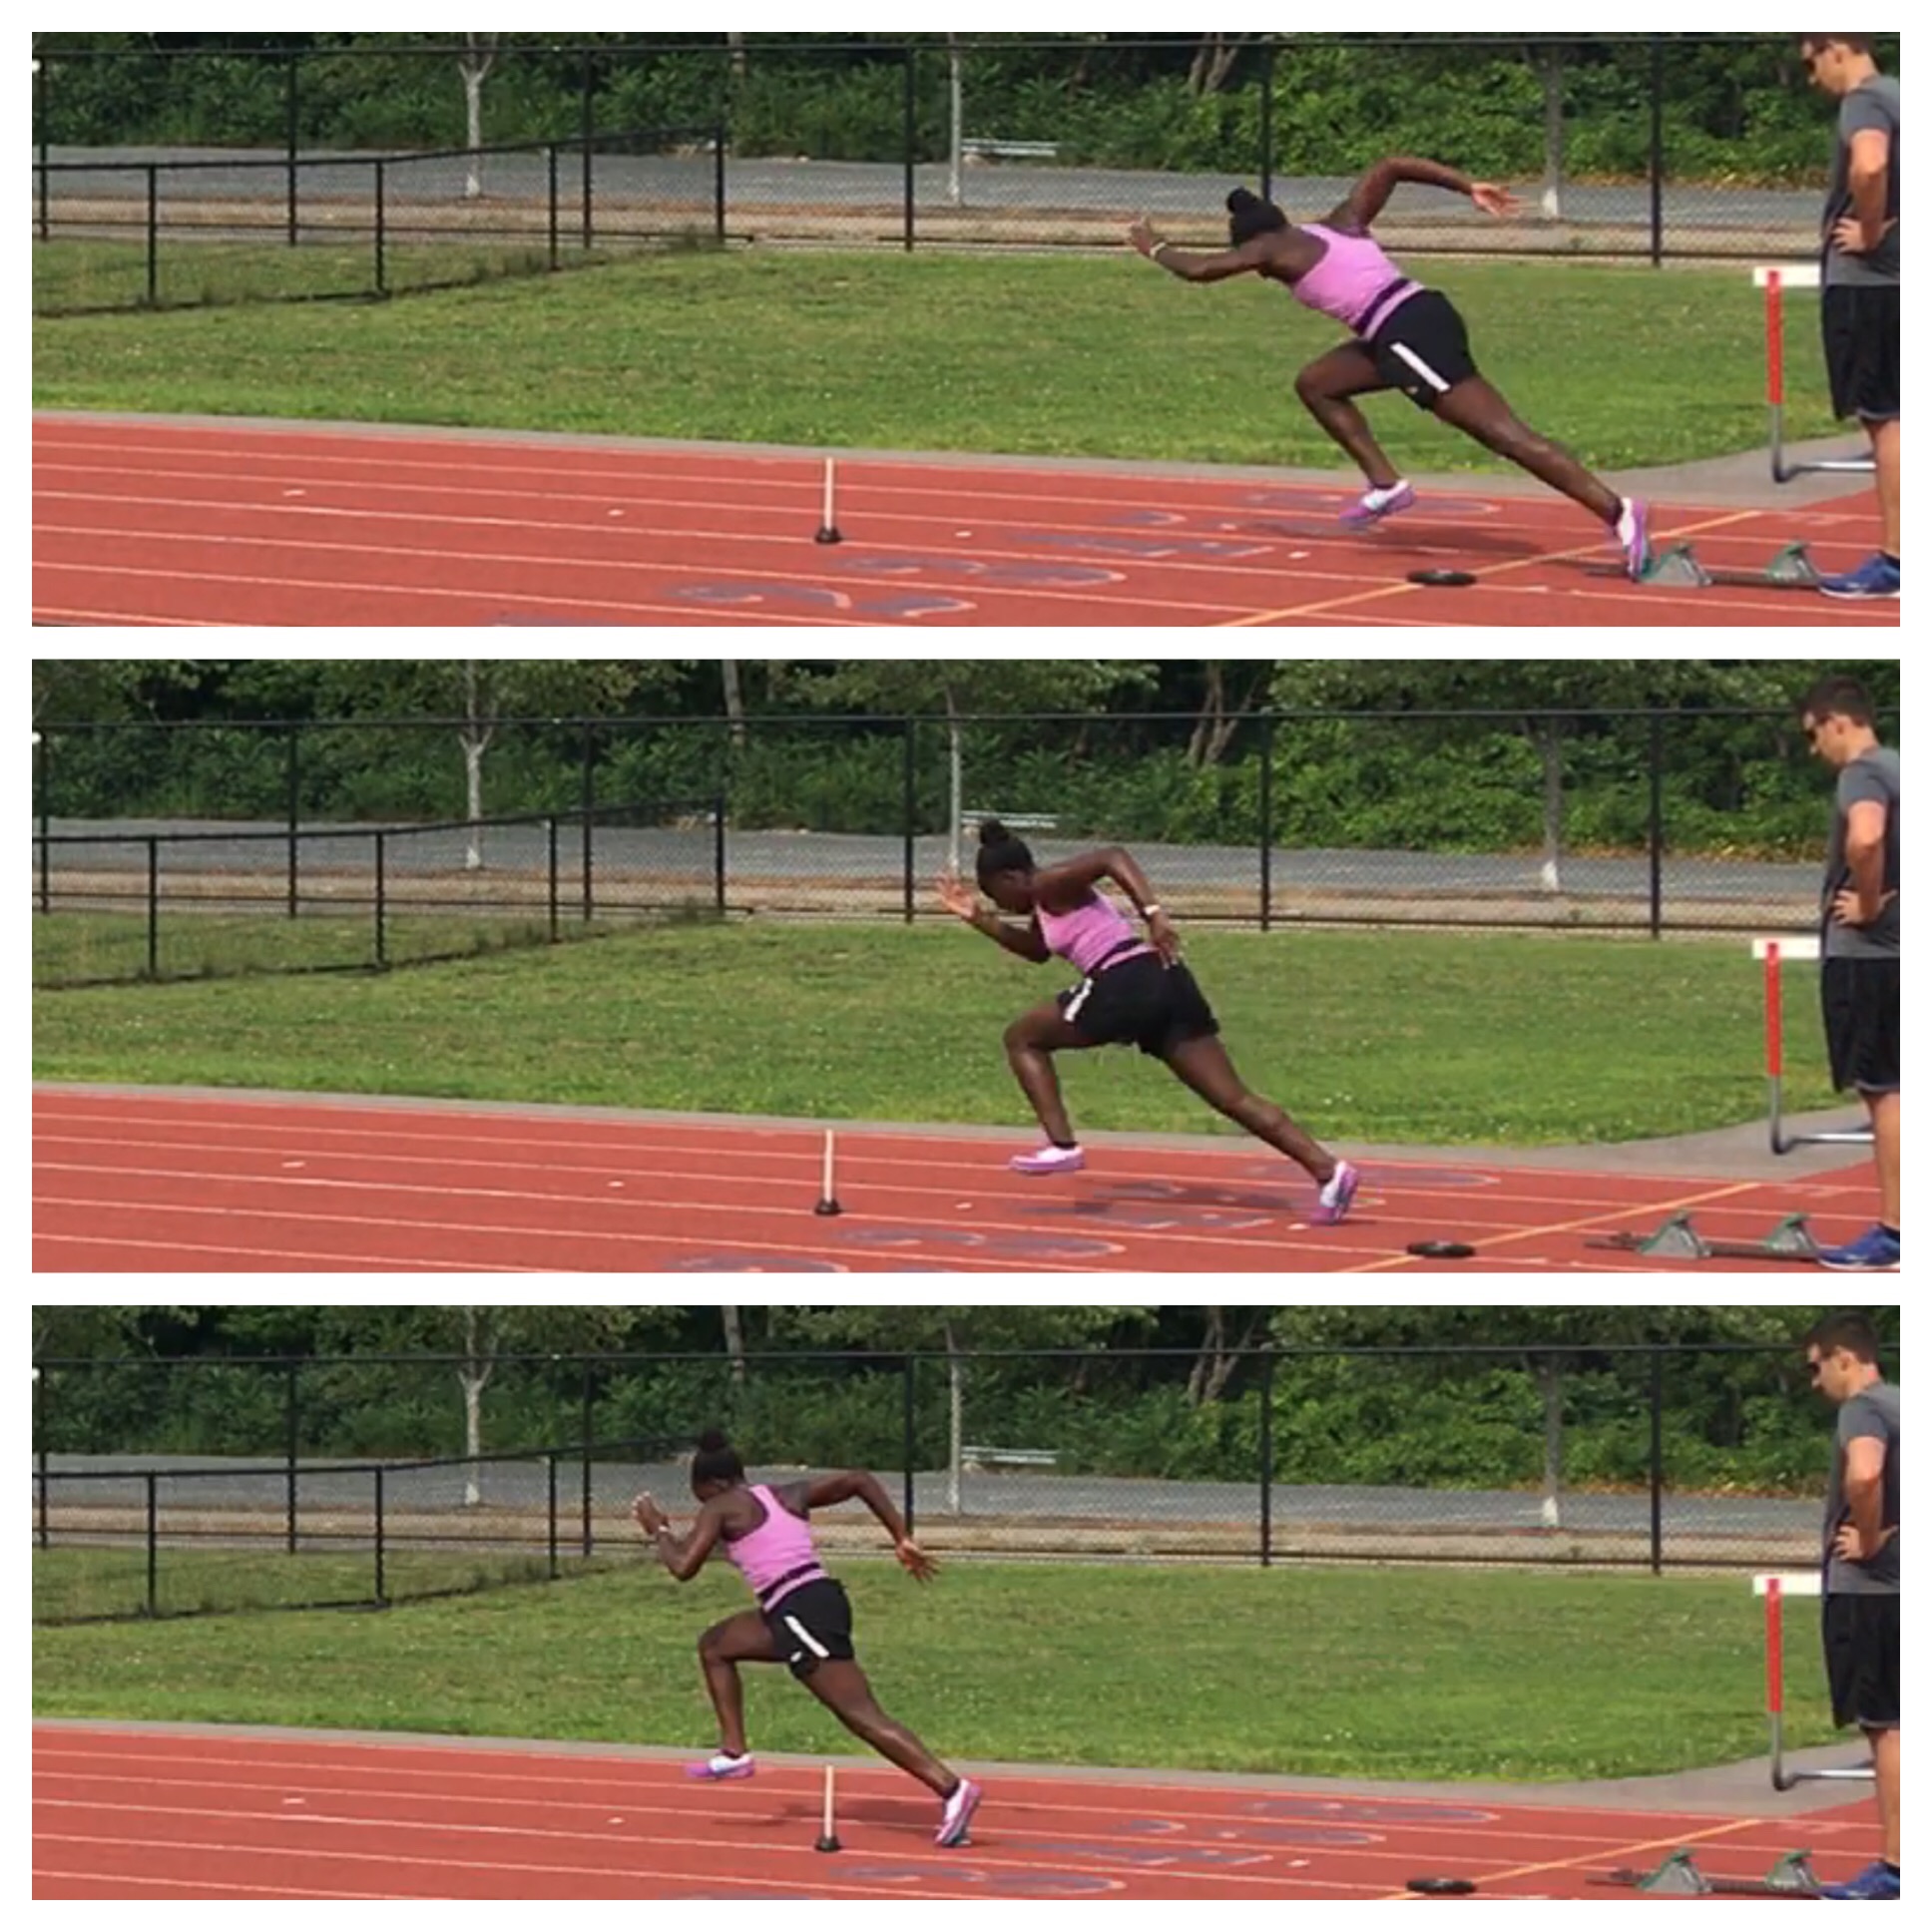
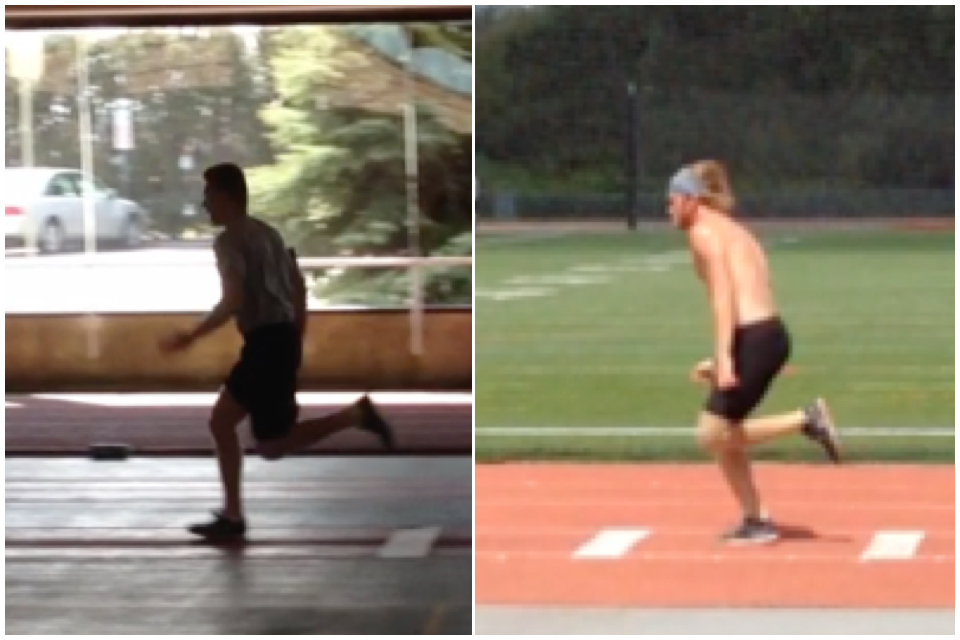
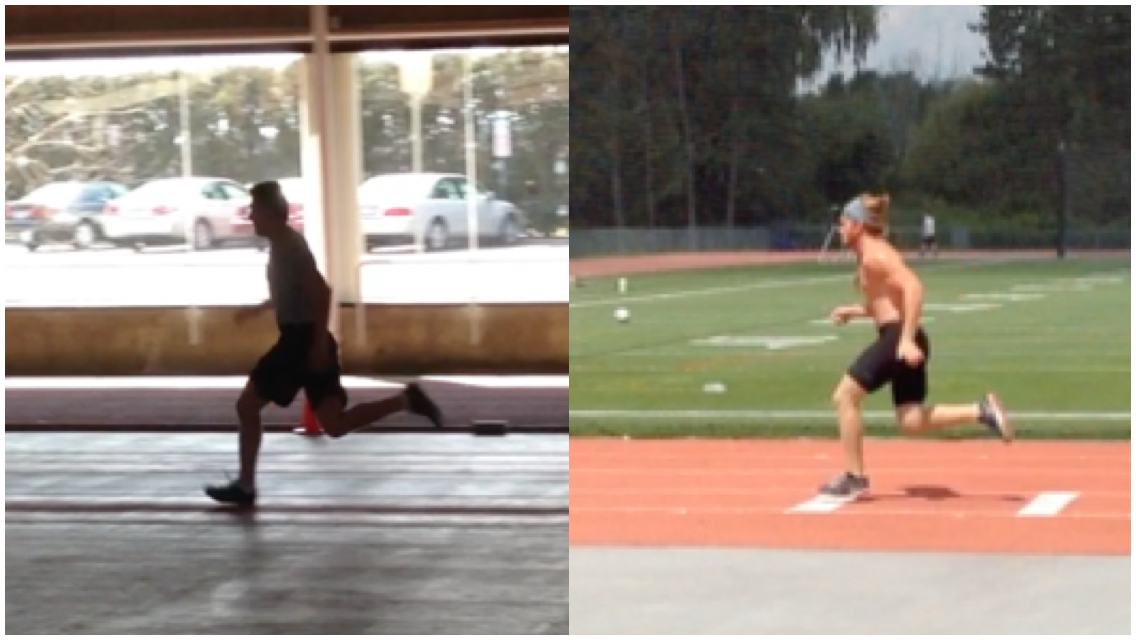
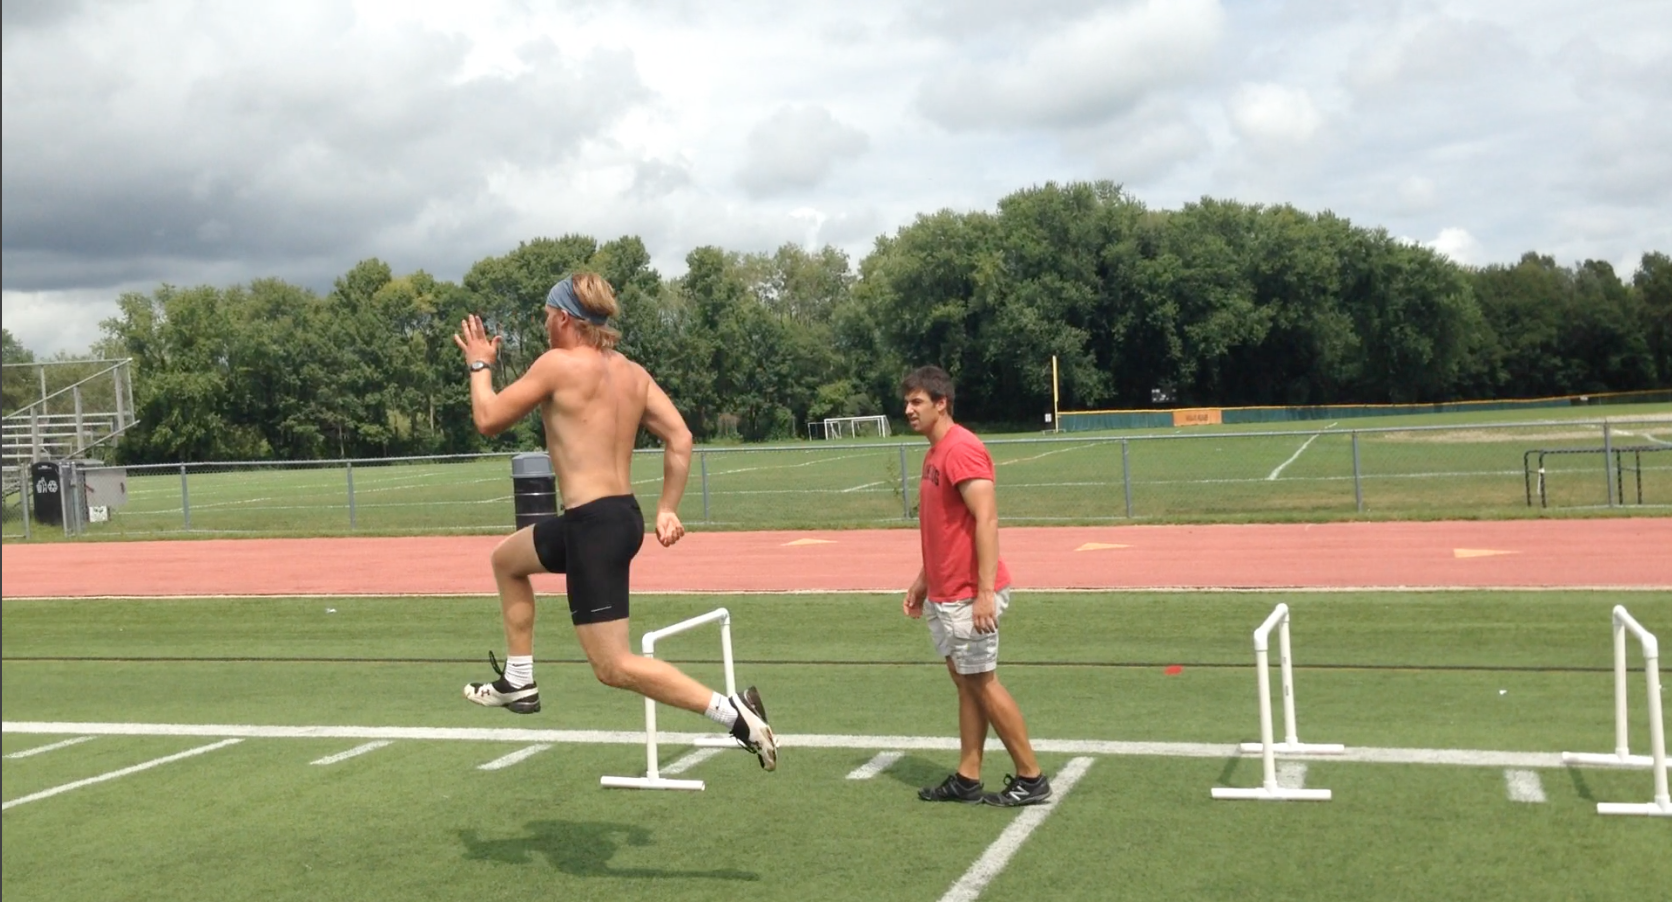
Hurdler executing a tape drill and hitting solid positions in the first few steps

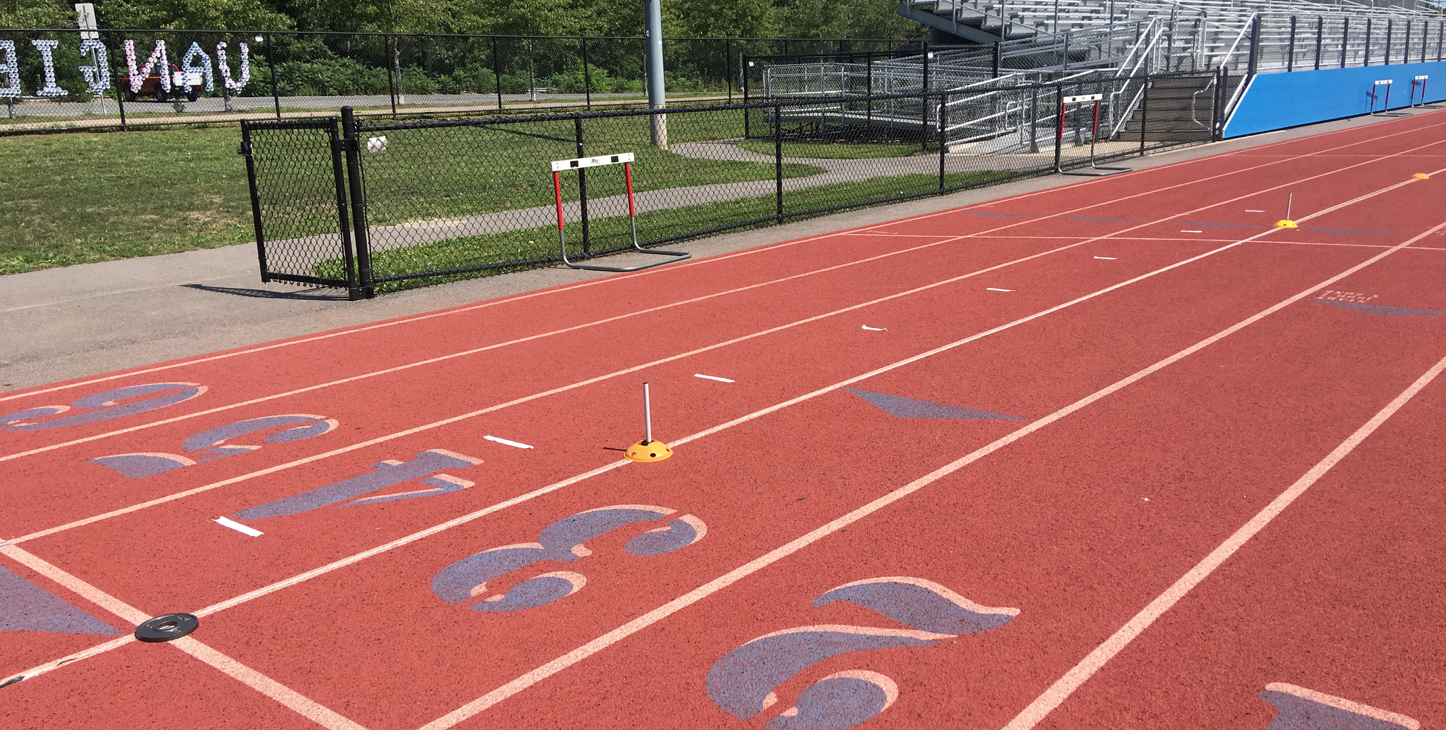
The above pictures show an approach to hurdle one using the tape drill. Similar to wickets, the tape provides an external environmental cue for the desired progression of stride-lengths (generally increasing) throughout the acceleration.  The athlete’s goal is to project themselves so the ball of the foot lands on the tape during each step.  I’m a big believer of individual signatures in stride patterns, but it can also be valuable to regulate or push step lengths in certain directions. In the case of the hurdle races the advantage of a tape drill is fairly obvious. The distance to the hurdles is fixed so the acceleration pattern demanded is very regular and can be modeled, rehearsed, and evaluated via the tape drill.

Outside of pre-determined acceleration patterns, the tape drill can be used to encourage aggressive projection with each stride distance increasing incrementally. If you’ve timed this kind of work, you’ll find it’s generally slower than cutting people loose sprinting without the external stimuli (same goes for it’s upright cousin- wickets). Knowing this, many would question why a coach would choose to use an acceleration variation that somewhat retards the velocities achieved in speed work.   As I see it, there are a couple of possibilities here.

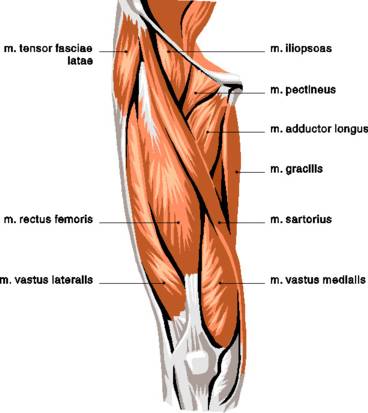
One is developmental progression or simply trying to push the acceleration pattern in a certain direction. This not only has skill components, but also physical qualities, as larger projections require bigger outputs and different stiffness demands. For example, in early acceleration with bigger pushes the overall forces expressed are higher which requires the ankle to handle increased loads while maintaining stiffness in an up on the ball of the foot position. This challenge can lead to favorable adaptations to better express acceleration speed in the future.

Screen Shot 2017-08-15 at 2.30.16 PM

A second possibility for positive implementation of the tape drill is temporal or rhythm manipulation.   Tape drills are an option for getting athletes out of faulty paradigms like rushing and being choppy. Often it’s easier to move to a different environment to coax change than simply trying to cue in the same domain the athlete is already struggling in.

A third possibility for the use of the tape drill is to provide some variety and potential for progression throughout the training calendar. It can be used as an earlier season acceleration option with more of a technical focus. Acceleration sessions can progress from there to more intense environments that eventually lead to something like block starts with multiple athletes beside each other to increase arousal and outputs. Conversely, later in the year the tape drill could be used to reign in velocities a bit by keeping an acceleration session more technical or to simply provide some variation from repetitive training.

Generally, I like to do a lot of my sprinting au natural, but the tape drill can be a useful option to enhance acceleration and technique in a speed program.

Long Jump Development with A Case Study Part I

I used to tell people that long jump wasn’t the most coachable of events. It was about being fast and reactive, and becoming faster and more reactive, to jump further.  Those things are certainly true, but as it is across the events, there is a dance between details and development.  What follows is a case study of a high school long jumper between his sophomore year, when he was a 21 foot jumper from 16 steps, and the end of his senior year where he jumped 23’5″ from a 16 step approach.  First we’ll compare two short approach jumps then progress to a discussion of the developmental and event-specific details involved in progressing him as an athlete and a jumper.

I included full speed and slow motion clips in the video above as it’s easier to see overall speed, flow, and rhythm in real time and the exact nature of foot strikes in slow motion.  As you can probably tell there are some big changes between the two jumps.  General approach posture, speed, and sprinting technique improved dramatically between 2013 and 2015.   There are also very big differences in foot strikes during the approach.

Technical Comparison – Approach and the last 4 steps

In the full speed video of the 2013 10-step, you’ll notice a disruption in rhythm 3-4 steps out and general slowing.  As Boo Schexnayder often suggests, looking at what precedes the mistake is often where to find the cause.  In a long jump approach you should see pushing and rising that rhythmically ascends to the vertical orientation needed for takeoff.   In the 2013 jump the athlete is excessively pushing out the back in his sprinting with an anteriorly rotated pelvis that isn’t progressively rising in the approach.

(Figure 1) After toe off of 5th to last step in 2013-Foot was on the ground well behind the body and the pelvis is out of step with trunk posture

Putting the feet out in front from the position displayed above in Figure 1 is a common strategy I’ve seen high school athletes use.  It’s akin to a stumble reflex for long jump – the athlete senses they aren’t in an appropriate posture to take off at that speed and thus puts the foot out in front of the body.  These abruptly more vertical or obtuse foot strikes bring the body and pelvis upright (leaning it back from the anteriorly rotated position) while also bringing the athlete to a more frontside orientation needed for takeoff.  The obvious issue is the large sacrifice in horizontal velocity with these blocked or braking steps, altered recoveries for the succeeding steps, and the undue tissue forces that these strikes cause.  

4th to Last Step

3rd-to-last-step

(Figure 2) 4th to last step in 2013 and 2015 respectively

By the 4th to last step in 2013 you’ll see this stumble reflex strategy in action with an out in front heel first strike and the pelvis in a butt-out or excessively anterior rotated orientation.   Comparatively, in the 2015 8-step approach the athlete could be a little more upright at this point (he is trying to over-speed the shorter approach a bit), but the strikes are good, hips are aligned, and the posture is progressing smoothly through the approach.

3rd to Last Step

2nd-to-last-step

(Figure 3) 3rd to last step

Although both of these pictures are a frame early for the 3rd to last step, you’ll see the foot strike in 2013 is even further in front of the body than the step preceding it. The athlete is using blocked or braking steps to achieve the vertical orientation needed for takeoff vs being able to put his feet underneath him and sprint to this position.  Meanwhile, in the 2015 8-step the shin and body continue to progress to a more vertical orientation.  Ideally the athlete would be a smidgen more upright by this point in 2015.  Even in a short approach long jump shin angles and overall posture should progress to a relatively vertical orientation by the last 3-4 steps.  This helps build takeoff skills that can be carried over to longer approaches where the jumper will already be upright by this point of the approach.

Penultimate Step Preparation

ground-prep-penultimate-2013

(Figure 4) Flight/air phase off of the 3rd to last step in 2013

The flight off of the 3rd to last step in 2013 displays an almost scissor-legged position with an extreme angle of the penultimate foot to the ground.  Successfully striking and rolling through the foot from this position that doesn’t match the rest of the run is nearly impossible at high speeds.  The considerable slowing coming into, and off of, this step makes further sense with this odd penultimate step paradigm.  Going back to the slow motion clips, you’ll notice more congruency in flight between the preceding steps and the penultimate in the 2015 short approach.

Penultimate Step (2nd/Next to Last Step)

penultimate-step

(Figure 5) Penultimate step comparison between 2013 and 2015

Comparing the penultimate steps above, there is more frontside distance in 2013 while the foot begins to interact with the ground much more underneath him in 2015.   Looking back at the video you’ll also note that the foot strikes the ground in a extreme heel first orientation in 2013 with much more of a rolling contact in 2015.  We want the penultimate step to roll heel-to-toe, not ground on the heel and then have the toe slam down causing a large loss in horizontal velocity.

Plant and Takeoff

takeoff-2013-and-2015

(Figure 5) Takeoffs in 2013 and 2015

The plants for takeoff don’t produce incredibly dissimilar still pictures, despite the fact that the loss of speed coming into the plant in 2013 is significant.  In the takeoff pictures above, the free leg quickly swings out in front in 2013 with a small archetype of that still remaining in 2015.  This scissoring action of the legs in 2013 mirrors what you see two steps previously in the flight phase coming onto the penultimate (this can be seen in the picture of the flight/air phase off the 3rd to last step that can be found in Figure 4).  As Boo has very astutely pointed out, actions and steps often correspond to what happened when the limbs were in the same positions two steps before.

Details of Development

So in the 2013 short approach jump you have an athlete that is struggling to control the pelvis, pushing out the back, and putting his feet out in front of him in the last few steps of the approach. He also has an odd penultimate action and a scissoring free leg at takeoff. How do you correct the above items? Do you just simply cue each of the above? Do you work developmentally to build general skills and bring up deficiencies, waiting until those are in place before correcting the event actions? As is often the case, I think it’s a bit of both and you should work in parallel-stream (credit to coaching friend Daniel Martinez for the term); bringing up general development while also coaxing event technique to levels that current development supports.

In part 2 we’ll begin to explore the general and event specific details that helped produce the changes you see on the runway between 2013 and 2015.


Plyometrics-Multijumps: Pretension, Teaching, and Training

The question below is from a coach I met at the 2012 BSMPG  Summer Seminar where Boo Schexnayder spoke. In my response I’ll talk about what people popularly refer to as plyometrics or plyos, but I’m going to follow Boo’s lead and use the term multiple jumps or multijumps. Plyometric actions could be upper or lower body in nature and for lower body also include tasks like sprinting. Below I’m focusing on multiple jump exercises so it makes much more sense, and is a lot more accurate, to just call them multijumps as Boo suggests.

“Question regarding something I walked in late on with Boo Schexnayder’s lecture and you had begun talking about outside. You mentioned that one of the best ways to teach the anticipatory isometric contraction that occurs prior to landing is to use some jump and stick work- hitting the ground and stopping. Would you mind elaborating on this for me? Why it works, how you would teach it, when to incorporate it?”

First off it was awesome, as it always is, seeing Boo Schexnayder  present at BSMPG as he’s a great coach. He’s also a great coach of coaches and his contributions to the USATF and now the USATFCCA Coaches Academy have been a huge help to many coaches including myself.

I don’t see multiple jumps (plyometrics) getting much coverage beyond youtube highlights on the net and you rarely see much detailing the coaching and teaching of this element. As such, in answering the above question, I’ll cover a little background for multiple jumps and what I’ve learned for early teaching and training. I’m going to start by discussing the “anticipatory isometric contraction,” asked about above which is often termed pretension. From there I’ll discuss some of the early training tools I’ve found useful in teaching pretension and multijump skill.

So what is pretension?
When I use the word pretension in this post (Komi most often calls it preactivation) I’m speaking of muscular preactivation preceeding ground contact in a multiple jump. The quadriceps and triceps surae complex lead the way here as these antigravity muscles stiffen before ground contact.

Screen Shot 2016-04-11 at 10.31.52 PM

Pretension via stiffening of the quads and calves in in-place stiffness hops for a younger athlete

With this preactivation I’m also including joint positioning as even well timed and appropriate values of muscular force without good joint position and posture, won’t do much for you. Good pretension prepares and positions the contractile and elastic elements of the system to efficiently distribute, store and/or use energy from the landing(further resources below). I think of pretension as the landing prep to absorb and/or redirect force upon ground contact. Muscles with a late start respond too late.

So how do you teach pretension? What cues do you use? Like most athletic actions, you coach directly some and don’t coach when you shouldn’t. Most importantly, you select appropriate training and coach to assist the development in that environment. Like most higher speed athletic actions, multijumps involve a lot of reflexes and tuning of force (timing, amount, and switching) that isn’t always explainable or cueable. I’ve found it has to be learned by selecting, doing, and of course coaching of appropriate training. In other words YOU BUILD IT IN.

Good training is teaching and the bonus is you are also getting adaptations while learning. If you choose good training, these adaptations fit what you need to do in the future while also improving support qualities that enhance performance.

Pretension Setups
Appropriate pretension starts with an understanding of the different joint angulation demands in various multiple jumps and athletic actions (remember positioning goes with pretension). When looking at the angulations in multijumps at the hip, knee, and ankle you see two primary setups (this will be simplistic, but as I get into training and teaching my perspective will make sense). Both setups display similar ground prep for landing and differ primarily in the degree of joint angulation during amoritization or absorbtion. Actual exercises performed and whether they are in place or with translational speed affect the exact nature of foot contact, where the joint bending occurs, and the distribution of muscle actions. However, in general you have multijumps with less joint bending and those with more.

The first setup involves a stiffness based pattern with small joint bending at ground contact at the ankle, knee, and hip (pic). You’ll see this in stiffness based and redirection based exercises like stiffness jumps/hops, hurdle jumps/hops, cone hops, vertical bounds, power based skip variations, classical horizontal bound varitations (more hip extension action pre ground contact here) , etc.. In general the landing or foot strike occurs on a stiffened leg and the yielding is small and predominantly from the knee and ankle.

Screen Shot 2016-04-11 at 10.06.24 PM

Mid-Stance and maximal yielding in a RRLL

The other primary joint orientation is found in the longer ground contact multiple jumps. This includes some in place multi-jumps like squat jumps or star jumps, broad jumps and repeat broad jumps (into sand), multiple throws etc.. The ground prep position is virtually the same as the stiffness based setup above, however the yielding or amoritization pattern demands deeper angulations at the ankle, knee, and hip. With that deeper yielding pattern there is generally a lot more hip bending (anteriorly rotated pelvis and torso) and the ability to direct amoritization into appropriate sharing of those deep joint angles is a requisite skill.

Screen Shot 2016-04-11 at 10.47.15 PM

Maximal yielding in repetitive squat jumps (yes this athlete had fabulous ankle mobility)

Training and Teaching Pretension (ground prep and amoritization/absorption skills)
If you attended Boo’s lecture you saw an example of a low intensity multijump circuit (he called it foot prep) which is a simple and elegant training solution I like a lot as an early multijump element that helps train and teach pretension. The circuit design below is largely a credit to Boo and some of his stuff I was exposed to from his time at LSU.
An example of a Low Intensity Preparatory Jump Circuit I’ve used a lot

GPT foot prep
Double leg stiffness hop x20
Single leg stiffness hop x10RL
Double footed mini line hops x20 (10 each side)
Wideouts x10 (bounce, drop to squat and bounce out of it to tall)
Split shuffles x10RL
Speed skater x10RL

Generally I don’t even count the exact number of contacts and just go on/off with a general amount of time for the elements. Rest between elements is equal to 1-2x the work.

This is just an example and you can even use things like an easy shuffle to stick or go back and forth between single and double legs. Different jumps and directional changes within a single element a la hopscotch are also fair game (careful you are getting foot contacts and posture you want though).  At first glance the circuit above is just some bouncy little plyos organized in a circuit. Look a little deeper and you’ll notice within this circuit you have a variety of basics for learning multiple jump skills (including pretension) for more advanced elements.

Double leg stiffness bounces provide an environment to teach the loaded ankle and quadracep tension in a simple bilateral scenario. Single leg stiffness bounces reinforce that in a single leg scenario and also present an opportunity for working on the basic free leg positioning you’ll need for posture preservation in more advanced activities (it’s not behind you). Double footed line hops (think of it as a mini cone hop) are an ankle and knee dominant plyo with a lateral element that can have stiffness characteristics very similar to tuck jump and hurdle hop variants to come.

Wide outs demand pulling into deeper joint angles you’ll need both for initiation and absorbtion in longer response jumps like squat jumps, star jumps, rocket jumps etc… Split shuffles involve a mini split squat position similar to those used in scissor jump variants (posture very important) and also involve leg exchange. Speed skaters are a hip dominant mini lateral jump (I prefer to not let the free leg swing across) to teach patterning for lateral and multidirectional plyos while also giving some unique stimulus to the lateral subsystem.

In Place to Translational, Jump and Stick, and Beyond
Above in the rationale for the GPT foot prep circuit I discussed the two primary types of joint bending you see in plyos and how translational velocity (yes, I’m including direction) will affect the exact nature of foot contact, joint bending, and force distribution. Often, very early on in the above in place jump circuit the double and single leg stiffness hop may be changed to forward or backwards variations (translation allows the opportunity and option to work on rolling through the foot). Some of the elements may also be done with a stick as coming to a stop exaggerates the feel and demand for balanced and appropriate pretension and absorption patterns (there’s your jump and stick).

The first items on the stick list are usually the single leg stiffness hop and the mini lateral jump w/ stick. Sticking on a single leg overloads single leg stability, providing a good assessment and awareness for the athlete therein. The single leg stiffness hop w/stick can be done in place or traveling forward or backwards. I call the single leg stiffness hops in a forward direction, mini-stabil hops as that’s how I was introduced to them by Carl Valle. The hops are small and shouldn’t be jabby or jarring horizonally, but have a nice smooth landing with the foot and leg catching the ground. As these go to dynamically moving forward the roll is heel to toe through the foot. Done well these teach the pretension, posture (including the free leg), and the roll of the foot necessary for rudimentary hopping and bounding. These make a nice segway and can also be included in a rudimentary bounding inventory like Dan Pfaff’s rudiment.

Screen Shot 2016-04-19 at 9.01.06 PM

Power Skips for Height and Distance are great rudimentary bounding options for beginner and advanced athletes alike

Speedskaters are often done with a stick from the get go in the above low intensity jump circuit. This helps to exaggerate the deceleration and stability elements of coming to a stop laterally and the pauses also make it easier to teach any changes that may be needed in this relatively deeper absorption pattern. Once athletes demonstrate good skill with a stick these can be done dynamically without a stick. Down the road you can also progress them to a mini-vermeil bound, which takes the above pattern and moves it diagonally forward. Vermiel bounds can also be done with a stick to correct any errors in absorption and the general skill progression is from smaller to bigger amplitudes with the option to add weight via a weight vest or small hand weights for more advanced training down the road.

Screen Shot 2016-04-11 at 9.57.17 PM

Vermeil Bounds (zig-zag bounds) with blocking pads serving as a visual stimulus to encourage width in the bounds

Split shuffles are also frequently done with a stick in early learning if athletes are struggling with positioning (often of the rotation of the leg or foot) or pelvic posture. As skill allows, amplitudes can be increased to exercises like scissor jumps.

The deeper absorption pattern of wideouts are often used in a jump and stick fashion in elements like star jumps w/ stick, squat jumps with stick, and squat freeze jumps (hands out in front like a landing gymnast for some general rehearsal of landing skill for jumping events or landing with hands in front at the ready as is often the case in ball sports). Broad jumps into sand can also be landed with the hands out in front to rehearse general landing skills. Hurdle hop like elements can also be done with a deeper wideout like stick (with the arms cocked back at the ready) early on and the deeper angles where stiffness is developed is similar to the deeper angles found in early acceleration (see block start hops with stick).  Down the road altitude landings and other more advanced elements, may use this pattern as well.

Screen Shot 2016-04-12 at 12.02.40 AM

An example of sticking a deep landing in hurdle hops

Double leg stiffness hops are the double leg analog to the single leg stiffness hops above and as they are moved from in place to traveling forward the pretension, contact, and stiffness patterns are even briefer contact variants of their single leg cousin. The contact pattern you are able to achieve here from a cocked ankle position as the foot fires itself will be similar to what will be developmentally appropriate as a contact pattern in hurdle hops.  The mini-line hops are usually kept dynamic in nature and can be progressed to line hops, cone hops, diagonal bunny hops and hurdle hop progressions.

While jump and stick is a great early teaching and training tool for pretension and talked about a lot in this section, in reality, the majority of most early programming will still be dynamically executed elements. Just as there is a variety of jumps and landing patterns in early training, having variety in absorption patterns helps vary the stress while also building athletes with a wider adaptive skill set.

Coaching and Upstream Skills
So what do you coach within these basic multiple jumps? In general you coach posture (tall, where is the pelvis?), encourage good arm action (thumbs up, amplitude and timing matches that of jump), and foot prep is important. Having a cocked ankle (locked and loaded/dorsiflexion) so the foot can fire itself into the ground or roll as needed in translatory multi-jumps is huge.

Dorsiflexion also allows for more full footed landings which is a larger surface to apply force with, more stable platform, and puts the triceps surae complex at length tension where it can store more energy (in bigger multiple jump actions the foot will go to a dorsiflexed position in amoritization anyway so you try to start closer to that position as the faster the rate of stretch the more energy stored). The ankle position at ground contact will differ athlete to athlete and devlelopmentally, but over time you like to see relatively flatter contacts to not jam the foot and also provide more specificity to the joint angles at the ankle in sports and competitive jumping events.

Screen Shot 2016-04-11 at 10.05.57 PM

Pretension setup in a short horizontal bound with the ankle prepped for a heel to toe roll

As mentioned above with the ankle, you do coach joint angulations a bit if things are being misdistributed. Sometimes cues here help, but many of your cue systems and need to cue will harken back to basic bending patterns at the ankle, knee, and hip. Just as good general strength in a variety of squatting(single and double leg), lunging, hinging/bending, bridging, crawling, pushing, pulling, and twisting patterns provide a good platform for general movement the same applies to multijumps. If an athlete can’t do basic upstream skills like stand on one leg, skip, or do a basic lateral step down or single leg squat, downstream skills like bounding aren’t going to be successful or appropriate for them.

Weightroom wise, beyond the variety mentioned above, bilateral and single leg squat patterns are big as those are basic lowering patterns. I coach these movements in the weightroom very much like I’d like someone to yield if going down in larger yield in place or absorption based plyometric actions. For more advanced athletes, Olympic lifts give you free rehearsals under load with rapid switching from extension to absorption patterns. Your general warmup skills in marches, skips, dribbles, and other elements also provide motor machinery and reference points for posture, free-leg skills, and ankle prep. Again, good training is building in function with good coaching while training.

Access Points and On-Ramps
Some may see the above circuit as too simple or of too low an intensity for favorable training adaptations. You’ll be happy to know, with capable athletes, the above circuit is only used for about two weeks at the very beginning of the training year as a conservative, but higher volume reintroduction to multiple jumps. Week 1 we’ll often start barefoot in firm sand or on a thin mat to enhance the muscular work of the lower leg (also allows the coach to better see the feet he’s working with) and provide a more forgiving environment for mistakes (always remember sand overloads the tissue of the lower leg, so tread carefully or don’t tread at all for folks with calf, Achilles, or plantar issues). From there we’ll move to the flat, shod (with shoes), intensify and/or start to directionally move the jumps more as needed. By week 2 or 3, with these more experienced athletes, you’ll start to see classical exercise batteries similar to Pfaff’s rudiment and some small intensification of in place jumps.

Beyond an introductory training element the above circuit is a simple or rudimentary access point to allow training and skill development where more intensive batteries may not currently be a good fit. In today’s athletic climate you’ll see plenty of relatively high performance high school athletes, with low basic skills who may need doses of remediation. Younger or less developed athletes may stay with this type of low intensity in-place work longer to master basic skills while training in an environment that fits their ability levels. Athletes returning from injury may also use this simple in place battery as a reconditioning tool before returning to more intense work. With the wider developmental levels of athletes of the same classification, I think it’s critical you have an inventory with adequate access points or on ramps for the large variety of athletes to access higher levels of training.


Overspeed Training

Does overspeed training work?  Is it dangerous?

What’s better assisted towing (bungee or cable that pulls you to faster speed), downhill sprinting, or are there other options?

Towing and Where the Wind Takes You

If you look around you’ll find programs that have used overspeed training in the program and have been successful.  You’ll also find many folks who didn’t use downhill or towing that were successful at the highest level.  Over speed training can work.  In fact most good speed coaches already use it in a very simple way.  Running speed work with the wind at your back is overspeed, just as running into the wind is resisted speed.   It’s common to see good coaches use different parts (and thus directions) of the track to take advantage of the wind direction for speed work.

The difference between assistance via wind (reduced drag allows faster speeds) and towing is the athlete actually and naturally propels themselves to the higher speed with the wind.  In towing outside forces (pulley or another athlete via a bungee) contribute to their velocity and it’s more about tolerating the higher speeds while attempting to maintain sprinting mechanics.

Both the wind and towing produce higher speeds and eccentric forces which provide potential for speed improvement.  However, it’s handling those higher eccentric forces and contraction speeds in maximal velocity sprinting that pose the greatest danger to tissue, notably hamstrings.  The big disadvantage and increased risk for towing goes back to the athlete not naturally propelling themselves to that speed.  The athlete didn’t earn that velocity by a succession of sprint actions and the artificial influx of speed from towing often brings about reaching (further increasing eccentric forces and general discoordination (again they didn’t achieve the speeds by their sprint action and the delicate timing of muscle actions in Max V sprinting is likely to be disrupted).   If the athlete does manage to survive, adapting to these huge eccentric forces is likely where some obtain performance improvement.  However, the overloaded and altered sprinting often lead to athletes tearing hamstrings or beating up their tissue and neuromucular timing enough to set them up for it.  You still have to be careful doing speed work with the wind, but most coaches have found this to be the safer, more sustainable, and ultimately more successful option.

Going Downhill

On the surface downhill sprinting is an intriguing option.   Sprinting down a small declined surface of 2-5 percent increases eccentric force/power demands, particularly vertically, which is a key limiting factor in speed performance.  In the northeast many coaches get a taste of this option sprinting the downhill coming off the curve of banked 200m tracks.  My experience and that of other coaches I’ve talked to has been that you can do some flys off the curve and use the bank to teach a bit.  Downhill sprinting demands athletes not over push and to do it well neccesitates shorter ground contacts and slightly more frontside dominant mechanics which are paramount in efficient max velocity running.  Like the crazy blokes in the video below, push too long and you encourage forward rotation.

However, most sprint coaches aren’t going to be scripting downhill themed workouts.  The increased eccentric forces and altered stride and flight demands pose similar problems to the force and coordination issues of towing.  The declined surface introduces potential for reaching/braking and altered neuromuscular coordination if used as a main stimulus.  It’s also debatable if high level athletes would even be able to achieve higher max velocities on the declined surface.  I remember seeing a picture of an IAAF facility a few years back with a declined straightaway so their are folks out there experimenting with declined surfaces.  Still I haven’t seen many sprint coaches raving about downhill as a viable primary max velocity sprint training option where benefit outweighs the risk in a well thought out and executed program.

Sequential Overspeed By Increasing the Speed Limit

Supramaximal speeds and overloading speed actions are alluring for most folks as overload seems like an obvious means to improvement.  However, speed is a delicate and rate dominant nueromuscular task and introducing outside means of loading to the sprint action introduces the risk of interference with stagnation or worse detioration.  Good coaches commonly achieve relative overload by periodizing speed and manipulating conditions.   Classical short to long or velocity progressions by distance accelerated offer speed progression and overloads over the course of a program.

Additionally, coaches often use footwear and surface manipulation as a means of relative overload.  Doing accels in flats in the grass or on a field is an early season option for speed.  This may progress to the track, which then may progress to on the track with spikes.  Each progression offers increasing speed over the previous.  When working with field and court sports just using faster surfaces, footwear options, and doing well rested speed offers relative overspeed.  Where appropriate, adding in other athletes running at the same time or using a more stimulating practice setting (timing, testing, alternate facility) are environmental options to increase intensity.  Couple the above manipulations with periodizing  the other elements in the program (plyos, weightroom, etc..) such that they allow  and support increases in speed intensity over time and most coaches find plenty of options to overload and progress speed over the course of a program.   For overspeed my preference lies with a complete and progressive program with an occasional dose of wind.


Acceleration Imbalance Part 2

Coaching and programs are environmental.  Different group numbers, different facilities, differing athlete levels, differing amounts of time to train, and different training and sport loads demand different solutions.  In Acceleration Imbalance Part 1 I examined some of the problems field and court sport athletes encounter with acceleration dominant programs.  In this article, I’ll share some of the complementary sprint and run programming options I’ve found to result in more balanced and superior results.  Which options fit best depend on your athletes, your program, and your environment.

Acceleration Antidotes

Locomotion in the Warm Up- This seems incredibly simple, but with the large mobility deficits in many of today’s athletes (and the current awareness of foam rolling and corrective exercise (often warranted) many programs don’t take enough time to move athletes.  Doing dynamic flexibility has value, but it’s not the dynamics nor does it demand the tissue and joint dynamics of locomotion.  Skipping variations and running should constitute a good portion of the warm up if you want athletes to run free and well.  Getting moving, getting upright, and getting some hip extension and thigh separation is a good warm up and good training.  In sports where athletes always work short or don’t move much, finding spots in the training and competition week where athletes can get in quality warm ups is often cleansing.

Run in the Warm Up- With able athletes, I’ve grown to using more running in the actual warm up as athletes don’t become skilled at running without doing it.  One way I like to do this is placing strides in between blocks of skips or drills to build additional warmth while also working on general running skill.  These are usually very low key strides at around 70% speed.  They are fast enough to have decent mechanics and posture, but are still easy strides.  They serve as low intensity upright work as well as providing an opportunity to coach upright running in a simple scenario.   Further these runs are at extensive tempo speeds and serve as an opportunity to rehearse and coach mechanics for that type of work.  (In the private sector much of the athlete’s training is homework, so having some coaching time on elements not often seen is valuable).

An additional warm up setup I’ve used to interject more running is continuous in nature.  It includes strides that have dynamic flexibility work and drills in the walk back or rest period.  Over the course of this warm up the speed of the strides or buildups ascends.

Build me up– Buildups are a classical running exercise to hone technique and relaxation while warming up for speed.  Speeds can be capped to appropriate and safe levels and buildups can be more gradual in nature or more aggressive.  The athlete is exposed to upright posture and speed work at the level of your choosing.  If space allows, you can also extend the distances of these out or build and maintain to broaden the exposure to upright mechanics.

Quality Tempo and Submaximal Running- In many field sports like football and soccer, classical extensive tempo is a viable conditioning option to support sport performance.  If well executed, it’s also upright submaximal running (lazy postures and jogging speeds don’t cut it).   Quality tempo also tends to make hearty athletes with more durable tissue.

I’ve also found tempo speeds to be therapeutic for some athletes.  One extreme example is World Cup bobsleigh brakemen who accelerate for a living.  When on the circuit they are accelerating and pushing 4 days a week with no sport variety while also traveling every weekend.  Space is often limited, but when possible and appropriate, I’ve had success freeing up these athletes by doing a series of submaximal runs.  These are done on non-high intensity days at fast extensive tempo to lower end intensive tempo speeds.  Rest periods are prescribed so conditioning isn’t harsh and the runs serve as a tonic to relieve anterior chain tissue tension.

Intensive Tempo For Non Lactic Sports?– In working with off season football players (skill positions) I’ll sometimes use intensive tempo like workout setups for part of their sprint work.  Football is an aerobic-alactic sport so many would see this as non-compatible training.  However, not everyone can handle 3 or 4 pure sprint training days a week.  In the off season many guys are a ways a way from being able to handle full-bore upright sprint work.  This fast, but not maximal upright work, helps serve as a bridge to more pure speed.  The posture and speeds also serve as an elixir to open athletes up from all the acceleration based training.

Additionally, special team’s athletes and receivers find benefit from the rhythm developed in longer running.  Similarly, this work is also applicable for sports like lacrosse where athletes make end to end changes.  An example weekly high intensity setup I’ve used with success includes 2 acceleration based days and one day of 8×80 intensive tempo.

Some Speed Options To Stay Free

Accelerations and A Bit About Distances- In field and court sports it’s a given that you’ll be doing acceleration based sprint work.  How far out you take your accelerations depends on where you are in training and your individual sport and athlete needs.  A 20 yard accel for a high level wide receiver is flirting with speed, but is not exposing them to the really fast upright stuff.  However, a 20 for a heavy basketball center or an offensive lineman is likely nearing top end.  Conversely, we’d need to do an acceleration out to 30 or 40 to start challenging our receiver’s top speed.

Even with athletes that don’t necessarily get to top end in their sports, I’ve still found advantages in progressing acceleration distances out to points near or at max V.   The limb speeds, frequency, hip extension values, posterior chain development, relaxation, and elasticity developed by upright and top end speed work is unique and something most athletes should not neglect.

Starting High and Rolling- I’m not talking elicit activities, but doing speed work from rolling initiations and higher starting positions.  It’s popular to put athletes in pushup starts and deep angles.  However, the reality is much of their sport sprints begin with high two point starts or they are already on the move.

LB Start

Two point starts are unique in that they are more hip and frequency dominant, bringing athletes upright sooner.  With football LBs and WRs, simply starting some of their off-season speed work in 2 point and positional stances prepares them for these demands. In tightly spaced training facilities (20-30 yards to run), these higher static starts allow you to put athletes in more upright scenarios despite space limitations.

Rolling sprints are an upright start variation where the athlete sprints from a jog in or shuffle.  These runs are very similar to how most sport sprints begin.  The frequency demands are high and the athlete is quickly into top speed mechanics (Rolling Fast Easy Fast video below has this kind of start).

Accel and Maintain- This is simply a sprint with a prescribed acceleration zone and then a maintenance zone where the athlete continues sprinting upright, maintaining the speed they built in the accel.  Charlie Francis’ GPP Essentials helped popularize this concept for a lot of folks including myself.  An example would be 20+10 (sprint 20m, maintain 10m).  The maintenance zone can be lengthened to broaden the exposure to upright work.

As a coach, I get the acceleration training and upright sprinting at a velocity I’m comfortable with and the athlete is prepared for.  These are a great way to integrate upright work to stay free while also learning relaxation and sprinting skill.  This work also serves as a bridge between increasing acceleration distances and the accompanying increases in speed (some 20+10s preceeding a training cycle where I’m going to be accelerating out to 30).  This allows the coach to preview mechanics and expose the athlete to forces to come.

Back to Buildups- As mentioned above buildups are an excellent running modality to warm up for speed.  More aggressive buildups past 90% speed are obviously getting into true speed work.   Buildup variations combining a plyo into a build/sprint or a run with a unique posture focus can also fit here.

One such example I’ve used is an A run buildup (I learned from Carl Valle via Charlie Francis).  The athlete starts with an A run (high knee run) and gradually adds forward speed while maintaining posture until they are sprinting.  The A run should start (make sure they can do a good A run first) the athlete in good upright pelvic position and the challenge to the athlete is to maintain the frequency and posture through the run.   This serves as an excellent tool for teaching what the posture of maximal speed feels like while also exposing the athlete to a taste of upright speed work.

Variable Speed Runs- Sprint-float-sprint or Fast-Easy-Fast are zoned runs in which the athlete accelerates, relaxes/floats, and then accelerates again.  In track and field this type of run is often used to teach distribution of effort in short speed endurance scenarios.   For field and court sport athletes I’ve found occasional utility in these runs to help athletes break through upright speed barriers and also prepare them for longer runs inherent to their sports.  I’ve coached some American football special teamers who really liked this type of work and found it a big help for kickoff returners and kickoff coverage preparation.   In kick coverage guys are sprinting to build speed, floating while figuring out where to go or who to hit, then attacking and sprinting to the play or their assignment.  In this type of work the athlete is also getting a broad exposure and preparation for upright running.

Flys And Absolute Speed- Flys are basically pure maximal velocity work (30 yard build to 15 yard fly for example) and require solid preparation.  I’ve had some athletes who do great just running a 50 yard sprint for this type of work.  I’ve coached others who did much better distributing the acceleration a bit and really letting loose in a fly.   If the goal here is indeed maximal speed development it’s worth recording with good video equipment or laser timing to see which method is producing the higher upright velocities.  Absolute speed work has the highest frequency, hip extension values, and shortest ground contact times of any sprint work.  As mentioned in part 1 the pelvis is in a comparatively more posterior tilt orientation in top speed and the demands on the posterior chain are extremely high.  The posture and forces found here are second to none for opening up prepared athletes for speed.

Putting it All Together

For a given field and court sport athlete you are not going to be using all of the above options simultaneously.  Just as mentioned in the opening, it’s about choosing the correct options to make programs more complete and a better fit for the athlete and the realities of their training environment.  Simply put, in field and court sports, I’ve found better results by complimenting the acceleration dominant  nature of the sport with appropriate and balancing run training elements.


Acceleration Imbalance Part 1

Most informed coaches appreciate the importance of acceleration for field and court sports.  It’s the most prominent type of speed in these sports and is a highly trainable part of the speed spectrum.  However, with this importance and emphasis I’m seeing more programs and athletes that have overshot the acceleration emphasis into unbalanced programs that lack complementary running.   The results of the acceleration imbalance are often physical restrictions and at times injuries from myopic short only programs.

Acceleration Overdose

Short acceleration training like 10s, 15s, 20s, hills, and sleds are very popular and, if done well, very effective options to train acceleration.  However, if this is the only sprint and run training present the athlete tends to present with some of the following problems.

  • 1.Restricted Hip Extension and Separation–  Hip extension in acceleration is relatively more through the axis of the body than behind it.    Thus, the elastic restraints of the hip flexors aren’t used as prominently as they are in the higher hip extension values found in upright running.  The piston like action of early accel has more concentric dominant hip flexion because of this.  If athletes only do accel based work you tend to see restricted hip extension and limited thigh separation which results in shorter stride lengths and athletes that can’t open up.
  • 2.Quadzilla and Quad Lock-  This point relates to the first, but has a much cooler heading.  Acceleration is a more quad dominant sprint action.  Accel dominant athletes lacking complementary running tend to function quad heavy aka “quadzilla” which may not be ideal for their sport.  They can do all the posterior chain dominant weight room work in the world, but if they never use it in relevant scenarios at relevant speeds they are limiting performance.  If you’ve ever seen a running back burst through the line and then at 15-20 yards look like they are tight and stuck in the mud that’s some “quad lock” (redheaded cousin of booty lock that may be more aptly titled “quad block”).
  • 3.Tissue Issues- As described above acceleration overloads the quads and the hip flexor complex more than upright running.  I’ve learned from working on my athletes (and working with soft tissue professionals much more skilled than I) that appreciable accel volumes often produce high tone and localized areas of restriction in the quads and hip flexor complex.  The quads have much more variety of fiber type than the hamstrings (Quads are anti-gravity muscles often functioning at lower loads.  The hamstrings are more predominantly fast twitch in nature).  With this varying fiber type I’ve see more localized areas of disturbed tone and myofascial tightness.  Foam rolling the quads does seem to help (good manual therapy is awesome).  However, chronic loaders that never visit other realms to exercise tissue elasticity and freedom often end up with concrete quads.  The out of whack tonus and extensibility here often shows up in points 1 and 2 and is a feeder of points 4, 5, and 6.

  • 4.Tissue Issues Part 2 and Hip Flexor Dysfunction- In the acceleration action the psoas receives less elastic load to lengthen. Without complementary upright work athletes tend to end up short and sometimes dysfunctional here.  Things you’ll see are a tight psoas and often folks that become restricted and sometimes dominant through the two joint hip flexors, notably Rectus and TFL.  If the technique is poor or the accel action excessively overloaded (remember also that loaded sprints and hills retard hip extension even more) you’ll sometimes see lateral stepping which overloads the adductors.  This abducted and usually externally rotated position also brings the adductors into play as too prominent a hip flexor.
  • 5.Injuries from Insult- Take the first 4 problems via one-sided volume and multiply by time.  It’s not a surprise you see hip flexor and pelvic floor issues in sports that go predominantly short (football, soccer, hockey… sports hernia anyone?).   Additionally, acceleration is an anterior pelvic tilt based activity.  Combine that with the more anterior chain dominant tissue recruitment inherent to the activity and too much accel tends to further anterior tilt (by contrast high quality upright speed is more of a posterior tilt activity).  Unchecked, this anterior alignment shift often puts folks at risk for core/hip flexor dysfunction, back issues, and puts the posterior leg musculature at a mechanical risk.  Lower crossed, gross extension pattern, call it what you like, but sometimes the sprint and run programming isn’t helping and is part of the blame.  The tissue and alignment issues mentioned here, and in the earlier points above, often leave people hip flexor hamstrung.  Frequently the hamstrings pay the price for compromised extension patterns.

  • 6.Performance Problems- This is touched on in points one and two, but if all you work is one end of the spectrum you are going to end up unprepared.  One, you don’t actually achieve what you are capable of on the acceleration end and two you certainly aren’t fit to fly if you do get upright.  Field and Court sports are acceleration based, but many of these acceleration positions and initiations are much more upright than 3 point stances and crouch starts.  Higher center of mass initiations are more hip dominant and have a higher frequency.  To excel in these scenarios you better have at least touched on and hopefully trained and prepared in that realm.

Above I’ve outlined some of the problems I’ve seen with accel dominant programs for field and court sport athletes.  In part 2 I’ll discuss running options to complement the needed acceleration work while avoiding the problems listed above.

Saying Goodbye to Lefty

My grandfather passed away early Saturday morning.  He lived 98 years and he spent those years living.  He’s had a huge and wide impact on my life and who I am.  A big part of that impact is reflected in my passion and profession.   I love sports and preparing people in athletic tasks and I owe a lot of that to my papa.

Lefty Ray Freeman was as you may have guessed a left handed pitcher and played for NC State starting in 1932.  He wasn’t a fire baller, but was good at locating pitches and had a fantastic curve ball.  In 1935 NC State had the opportunity to play an exhibition game against the Boston Braves who were returning from spring training with their newly acquired slugger Babe Ruth.  My grandfather came into that game in relief and got to face Babe Ruth (Wally Berger was also on that team).   I’ll let him share the story from there as he was a fantastic story teller and loved telling them.


Papa vs. The Babe

He was the last living person who could have claimed to strike out Babe Ruth, but he was much more than that to me.   As a child I remember playing catch with him and having him outside encouraging and coaching me to shoot basketball.   I remember him being at many of my games for football, basketball, and baseball despite the 45 mile commute.  I remember him teaching me how to pitch and that he still could throw pretty dern hard despite being in his late 70s.

He was a huge fan of sports and I got to spend a lot of time appreciating them with him.  I frequently went to NC State baseball, basketball, and football games with my papa.  He’d even attend swimming and diving and other Olympic sports at NC State on occasion.  I remember him buying lifetime right seats to Basketball and Baseball despite being in his 80s.  Someone asked him what he planned on doing with his seats considering his age.  In his typically optimistic manner he simply replied with a smile “I plan on sitting in them.”

Sports to him were magnificent games, but they were also filled with a vast array of people and characters.  Who they were, where they were from, and what they liked were as much a part of it for him as the games themselves.   Sports were about competition, but he always appreciated the people who were competing.   Sports were entertainment and interest for him, but they were also friends and community.

Lefty Ray Freeman taught me that.  I’ll always remember that and I’ll always remember my papa.

Olney “Lefty” Ray Freeman

Head Games: Cue the Neck in Sprinting?

A fellow coaching friend asked me this simple question the other day.

Do you cue neck/head position in a sprint?

My answer: It depends on if the position is faulty in the first place, and if so, why the neck is aberrant.

Anyone can see this isn’t good neck/head posture for a start, but what things do you work on to fix it? 

First off, you don’t cue stuff you don’t need to.  This is actually a big part of this athlete’s problem that I’ll talk about more below.  Being careful with your cueing and exercise choices is particularly important in more athletic tasks like sprinting and jumping.  What may produce the results you are after in one athlete, may be an unneeded exaggeration that creates problems where there were none for another.  Sometimes cueing may get you closer to the surface aesthetic result you want acutely, but often at it’s at the expense of other moving parts or tightness where there shouldn’t be.

Going back to the picture above, if there is a genuine error, Is it an action error? General movement/skill insufficiency?  Physical posture flaw? Or somewhere in the middle?

Head protruding and down like t-Rex in the picture above is a common problem early in accel (head more acute to the ground than shin and trunk angles).

With a head like that, T-Rex wouldn’t have been good at block starts either (I gave my wife this T-shirt and it’s awesome)

Ironically, for those trying to “get low” the head down error makes shin angles more vertical to compensate for the forward and lower center of mass (the athlete has to step forward or laterally not to fall flat on their face).  In an attempt to create good angles to push from, they destroy them and also create other problems.  Common accompanying issues include a lack of vertical force or bounce with the early steps and extra energy used recovering from the inefficient postures and strikes.  These errors haunt the athlete later in the race and in energy distribution over multiple runs.


If your shin is almost vertical at step 4 (like above) in a 100m race that is a lot of the race left to be upright.

This athlete is usually near the front early so many would call him a “good starter,” but when running against other good talents he pays the price for his start mechanics and fades late in races.

Part of the issue for this particular athlete is he’s been over cued, like many young sprinters, to “keep his head down” and “stay low” (sometimes it can work to overstate a cue, but you have to be careful). Part of his neck/head and posture issues are attributed to simply just bad cueing.  In this case talking to the athlete and realizing the misunderstanding or flawed concept is the first step.   He has to understand the error (sometimes showing them a video or pic helps them realize the head down isn’t working even if it feels low) and then over time rid himself of the technical virus.  As a coach you provide patient feedback as he works on improving the issue and developing a new pattern. This often takes time particularly when it comes to executing consistently in higher arousal scenarios like competition.

The other part of the equation is ensuring the athlete has the basic general strength and movement skills to support the needed posture.  This athlete has a hard time stabilizing his head in relevant general strength activities as it protrudes and goes Mr. Burns in pushups, basic prone exercises, and classical pushing and pulling movements.  Humans have longer arms so he’s not in the predicament of T-Rex, but his pushup posture looks much like his upper back and head in the first pic.

Overall, he needs lots of well coached general strength work to provide him a platform to execute good postures in more dynamic activities.  However, if he just worked on the support end you wouldn’t see things change much.  As is often the case it’s an interplay between improving support qualities and improving technical sport skill as the two grow in harmony.

An excellent acceleration resource  is this DVD by Kebba Tolbert

En Generalmente

Going back to my friends original question, you only cue if you need to!  It’s often cases of a bad technical motif or general developmental gaps that have led to faulty technique.  Sometimes errors in force application are more a cause of the posture than simply the athletes positioning.  Outside of undoing bad concepts in acceleration, most often I’ve battled positional faults due to ineffective fights against gravity (the upper back and neck actually have to extend from the start position and counter gravity) and simply teaching folks patience not to look artificially down or up with premature movements of their neck (patience is huge in acceleration).

Faults in neck and head posture in upright mechanics or top speed are most often due to undue tension or bad posture elsewhere in the body.  Relaxation cues and general posture cues are usually the course for upright running.  Forced or over coached postures tend to be restricted postures that tie up the athlete.

If the athlete has general posture issues I find they are best addressed via training and execution in a variety and sufficient volume of general training scenarios (manual therapy is nice too).  Daily life stuff for the head and neck is more of a problem than ever and kids need to be educated on how to mitigate the damage from big chunks of time spent computing, IPading, and texting.

Making changes to head and neck posture in sprinting is usually a match step process of development.  As is always the case, well coached complete programs executed over the long haul produce the most competent and complete athletes.